Buying Guide — How Customers Purchase Tickets
A visual walkthrough of the ticket buying flow on mobile and desktop.
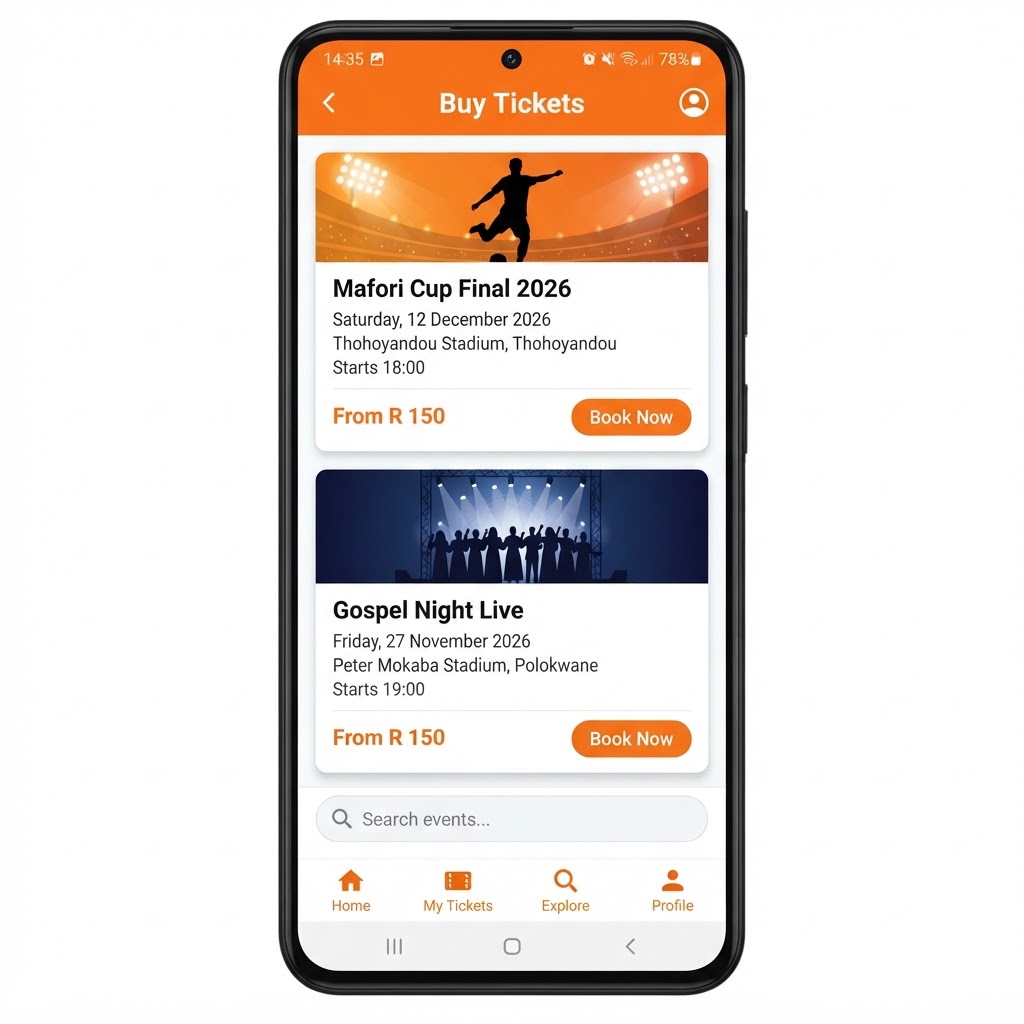
Users open the app on their phone and see a list of available events. Each card shows the event name, date, venue, and starting price. They tap an event to start the purchase. Events with closed sales show a red "Sales Closed" badge.
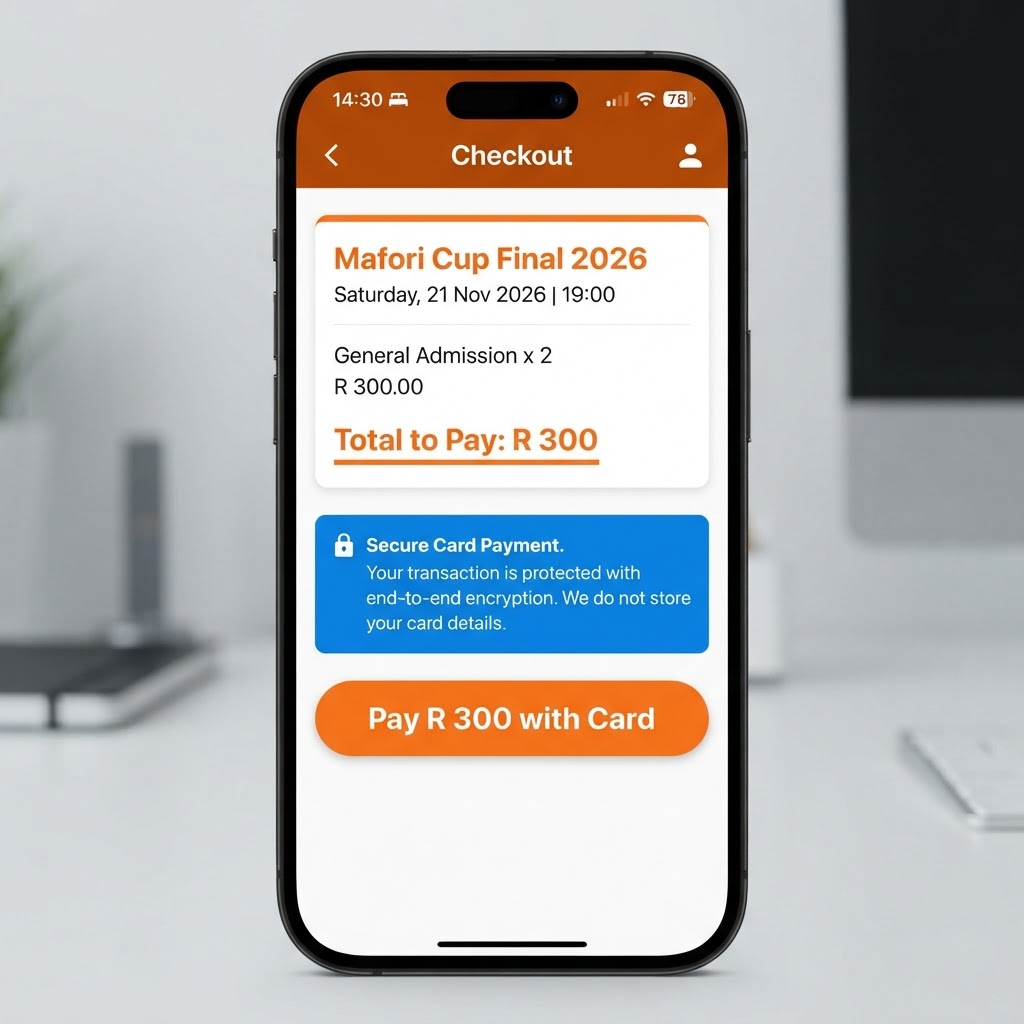
Logged-in users see their name and email pre-filled — no need to re-enter details. They can switch to "Buy for Someone Else" to enter a different recipient. After choosing ticket type and quantity, they tap "Pay with Card" to open the secure Yoco payment popup.
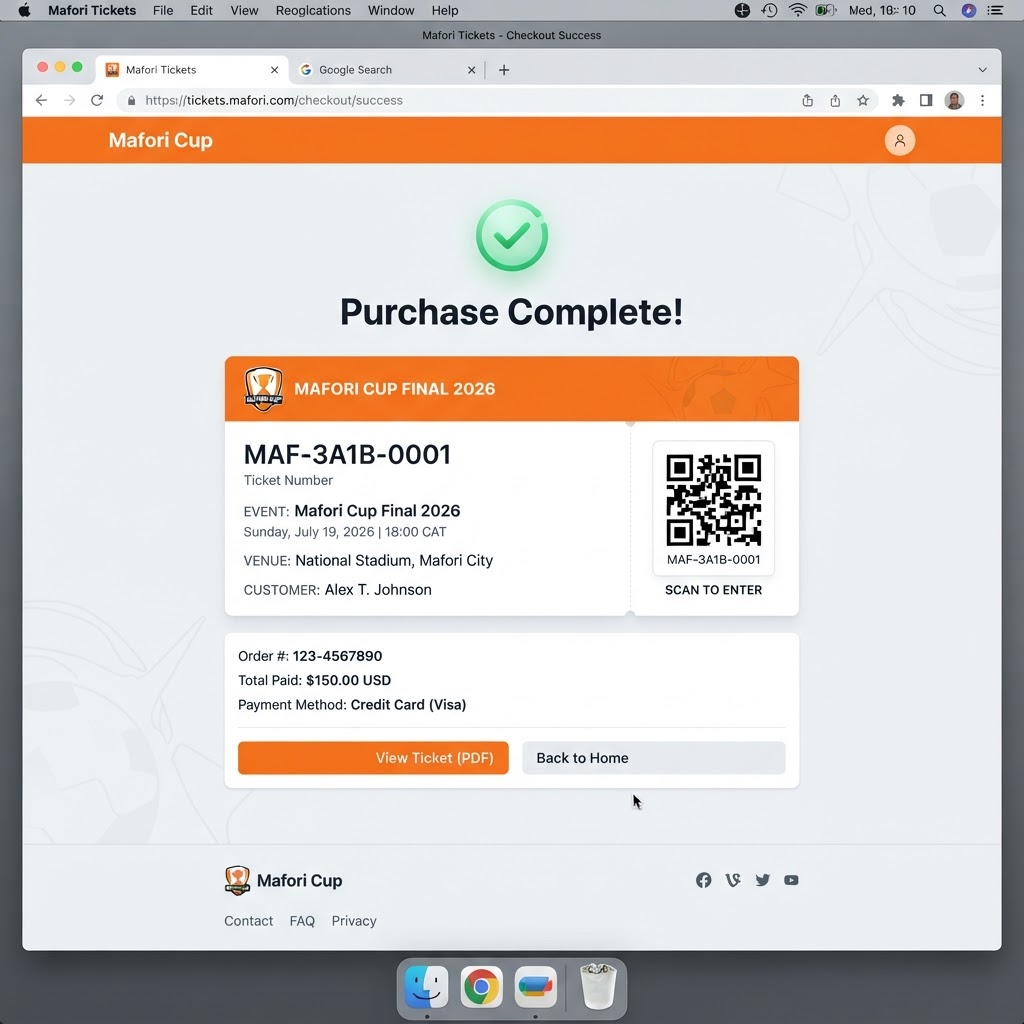
Once payment succeeds, the purchase confirmation screen appears with a green checkmark. The digital ticket displays the unique ticket number, event details, and QR code. The ticket is also emailed automatically to the buyer.